Elasticsearch, Spring MVC & Sencha Touch 2 in the Cloud – Part 2
![]() This is the second part of my blog on how to develop an application using Elasticsearch, Spring MVC and Sencha Touch 2. In my previous blog post part 1 I showed and explained which technologies I used to accomplish the connection between the frontend and backend. In addition I presented the steps to connect a database service (Elasticsearch) with a Spring MVC service. Part 2 will continue the development, in particular the connection between Sencha Touch 2 and the Spring MVC projects. Finally, I will show how to deploy the developed application into the cloud.
This is the second part of my blog on how to develop an application using Elasticsearch, Spring MVC and Sencha Touch 2. In my previous blog post part 1 I showed and explained which technologies I used to accomplish the connection between the frontend and backend. In addition I presented the steps to connect a database service (Elasticsearch) with a Spring MVC service. Part 2 will continue the development, in particular the connection between Sencha Touch 2 and the Spring MVC projects. Finally, I will show how to deploy the developed application into the cloud.
Demo Part 2
Step 1: Create Sencha Touch 2 Project
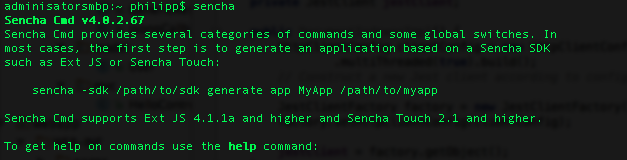
To create a Sencha Touch 2 project you need to download the Sencha Touch 2 SDK and the Sencha CMD. Add the Sencha CMD command to your path variables and you should be able to type ‘sencha’ in your terminal.
The next step is to create a new folder for example on the desktop and name it “sencha” and copy the downloaded SDK in this folder. Create a second folder in the sencha folder with the name of your application I used the name “DemoApp”. Now it is time to generate the application. Go in the folder of the SDK and type the command “sencha generate app -name DemoApp -path ../DemoApp”. Sencha Touch 2 is handling the rest.
Open your new created Sencha Touch 2 project in your preferred IDE. The structure should be similar to the screenshot below.

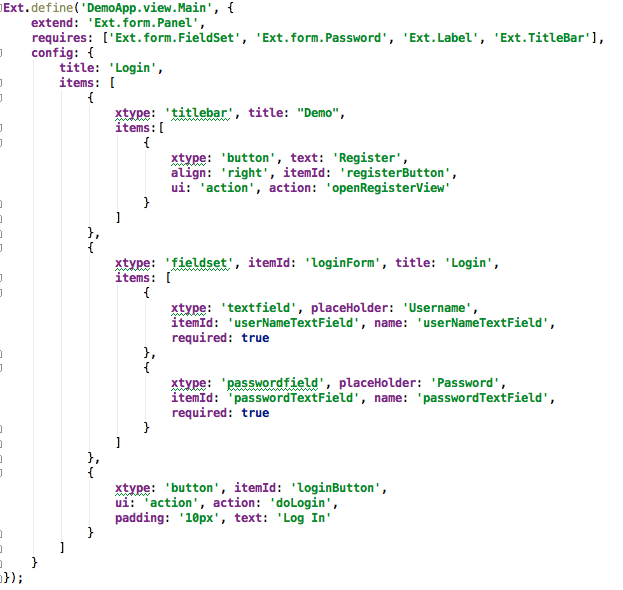
The purpose of the demo was the login and registration of a user, so let us start building the views for it. Sencha Touch 2 creates a default main view. I will be using this view as the login view.

The second view is the register view. As you will notice the view is very similar to the login view. For the purpose of the demo that is okay. Normally, a register view could have more fields that need to be filled in by the user.
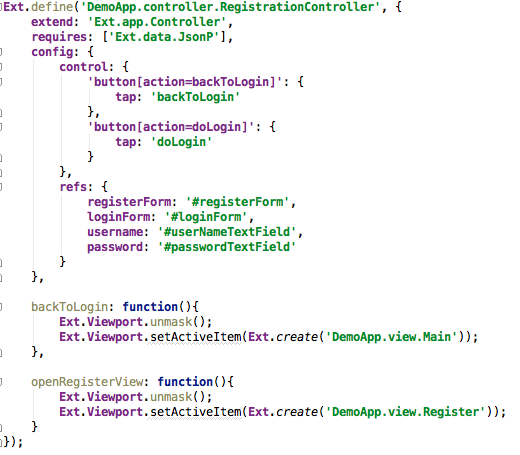
The next step is to create a controller that is responsible for handling when a button is pressed. This controller, RegistrationController has two methods backToLogin and openRegisterView.
Step 2: Connect Sencha Touch 2 with Spring MVC
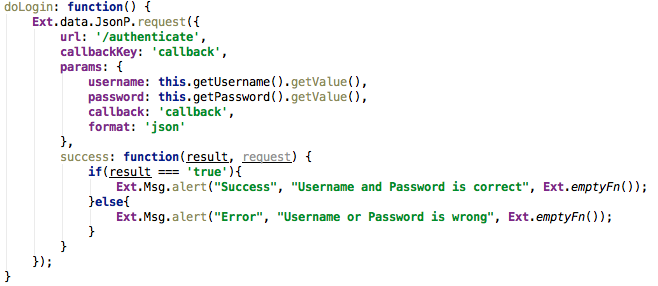
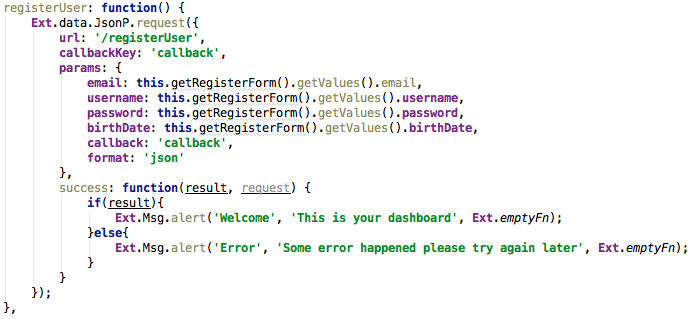
Until now our mobile app has no connection to our Spring MVC service so let us change this. To solve this problem we are going to add two new functions in the RegistrationController.
Now we just need to build our Sencha Touch 2 application in production mode, copy the folder and paste it into the static folder in our Spring MVC and we are done.
Step 3: Create Cloudbees Account & Application
To create the Cloubees account visit Cloudbees. Click on the SIGN UP button and fill out the form or you can sign up with your github or google account as well.
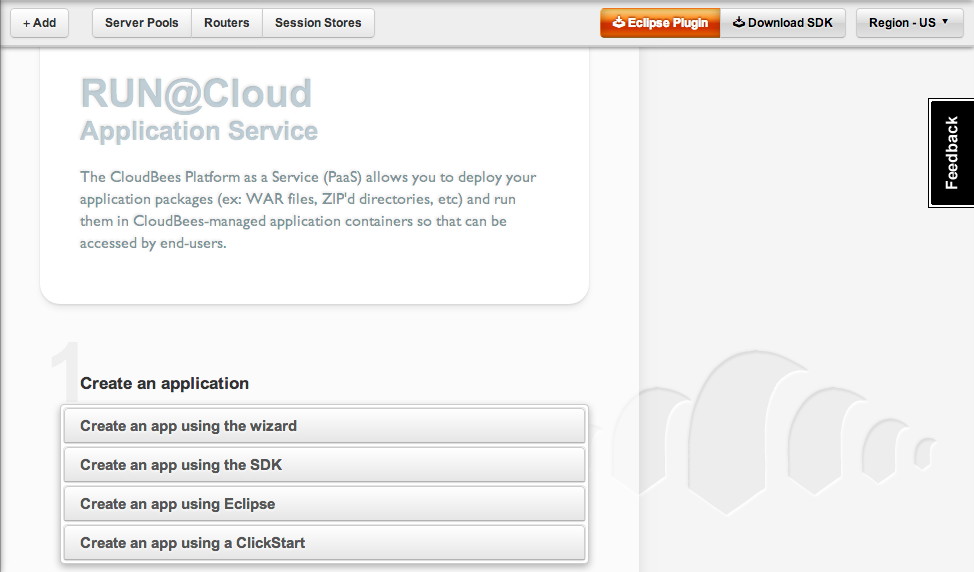
To create a new application on Cloudbees go to your personal dashboard and select on the left side Apps. There are several possibilities to create a new application. But before the creation we should change our region. Cloudbees deploys by default in the US region if you want to deploy in the EU region you need to change it. It is not possible to change this later one. Click on the button in the top right corner and select the option “Cloudbees – EU”.
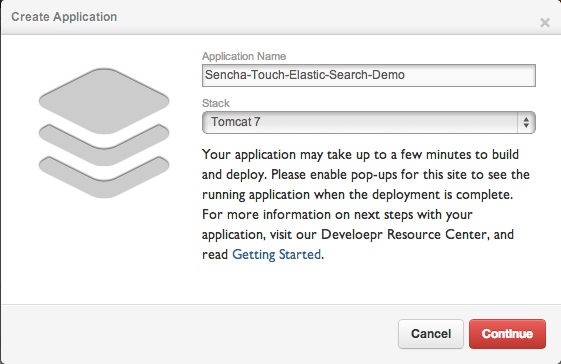
The next step is to create our application. Click on the “+ Add” button and give your application a new name. In this demo, I used the name “Sencha-Touch-Elastic-Search-Demo” and as a stack I took a Tomcat 7. Click on continue and your application will be created.
Step 4: Deploy to the Cloud

Cloudbees has two ways to deploy an application. You can use the cloudbees SDK or you can use the normal web interface. In this demo we are using the normal web interface. It is quite easy to deploy the application, you just need to find the .war file of the spring MVC project (usually located in the project under the target directory). The second step is to login to cloudbees and to select our created application in step 3.
Conclusion
As already mentioned in part 1 of this blog series, it is possible and easy to connect the used technologies with each other. Obviously, the chosen technologies can be replaced by other, similar ones. For instance, we could easily use another mobile framework such as jQueryMobile, Appcelerator Titanium, etc. instead of Sencha Touch 2. The same counts for Spring MVC and Elasticsearch, but I think these combine really good. I hope these blog entries have shown you how easy it is to create a simple application using these technologies and get them up and running in the cloud.