From The Trenches: LoRa, LoRaWAN tutorial with the LoRaBee
Once in a while you stumble across an interesting technology which is an enabler of new solutions, and new business cases. At Trifork Eindhoven we believe LoRa / LoRaWan might be such a technology. We are currently working on several Internet of Things solutions which could directly benefit from long distance communication, with a low energy footprint.
In this document I will describe the things that I learnt while working with the LoRaBee development kit. I will also provide some basic tutorials on how to set it up, how to start a connection and how to connect it with different platforms.
The hardware that I am using:
- SODAQ Mbili with Atmel 1284p Microcontroller x 2
- SODAQ LoRaBee which contains the Microchip RN2483 Module x 2
- A set of peripherals for data acquisition ( sensors, buttons, LEDs, serial interfaces… )
Quick intro into LoRa
According to Wikipedia:
“LoRaWAN (Long Range Wide Area Network) is a low power wireless networking protocol designed for low-cost secure two-way communication in the Internet of Things (IoT). LoRaWANs use of sub-GHz ISM bands also means the network can penetrate the core of large structures and subsurface deployments within a range of 2 km.[1]
The technology utilized in a LoRaWAN network is designed to connect low-cost, battery-operated sensors over long distances in harsh environments that were previously too challenging or cost prohibitive to connect. With its penetration capability, a LoRa gateway deployed on a building or tower can connect to sensors more than 10 miles away or to water meters deployed underground or in basements. The LoRaWAN protocol offers unique and unequaled benefits in terms of bi-directionality, security, mobility and accurate localization that are not addressed by other LPWAN technologies. These benefits will enable the diverse use cases and business models in deployments of LPWAN IoT networks globally.”
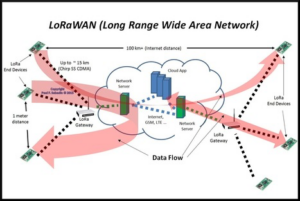
In the following picture, you can see the typical LoRaWAN network:

As you can see, all three classes are required for a fully working LoRaWAN network. In the tutorial, we used two LoRa end node devices for a P2P communication; however that is a simple radio transmit/receive between the LoRa modules and not the LoRaWAN protocol.
The Setup
The first thing to set up is the Development environment on the PC. Which can be either Arduino IDE or Eclipse. In this document I will mainly work with the Arduino IDE, since more people are familiar with it. Following this pretty good Sodaq tutorial to setup your environment http://support.sodaq.com/getting-started/. If all the steps were done correctly, you should now have all the necessary tools and environment for using the SODAQ Mbili with the Lorabee module.
The RN2483 module has a PIC32 microcontroller on board. This means that it can work autonomously and can be connected to other peripherals. The module is controlled through UART with the following settings: 57600 baud rate; 8 data bits; 1 stop bit; 0 parity. The Sodaq_RN2483 library for Arduino makes it easier to set up and use the module.
A list of commands together with a detailed explanation is available at: http://ww1.microchip.com/downloads/en/DeviceDoc/40001784B.pdf.
Simple point to point communication
This is the most basic communication that can be set between two RN2483. NOTE: In this example we will use the LoRa radio modulation, and NOT the LoRaWAN protocol itself, more details about the protocol can be found in the sections below. We will set up both Mbili boards as UART pipes, which means that we can control the modules directly through a serial terminal on a PC. In my case I have them connected at COM6 and COM7.
To set up the boards, you need to upload the following code: https://github.com/SodaqMoja/Sodaq_RN2483/tree/master/examples/microchip-serial-passthrough.
This program will set the modules in the default mode after which will establish a direct connection to the module. After the code is uploaded, open the serial terminal. If you get the following message: “SSFZXAConnection to the network was successful.” It means that there are no errors. If you get a different message, go again through the previous steps, and make sure that the RN2483 is connected properly to the board. The next step is to test if the module receives the messages from the serial terminal. Send “sys get ver” and you should get something like RN2483 0.9.5 Mar 24 2015 14:15:33 which is the firmware version.
On both boards send the following commands:
- “radio set freq 868100000”
- “radio set pwr 14”
- “mac pause”
Make sure that you get an acknowledgement “ok” after sending each of this commands, if you get any other response, you can find the error description in the module command datasheet. For the last step, on the transmitter send “radio tx <a random number>” and on the receiver write “radio rx 0”. If on the receiver terminal you get the number that was sent that means that the connection was successful.
I have programmed the two nodes in such a way that a simple pot-meter will send its value to a node with a servo motor attached to it. Depending on the resistance, the servo motor will turn accordingly. Here is the proof:
The TTN on LoRaWAN networks
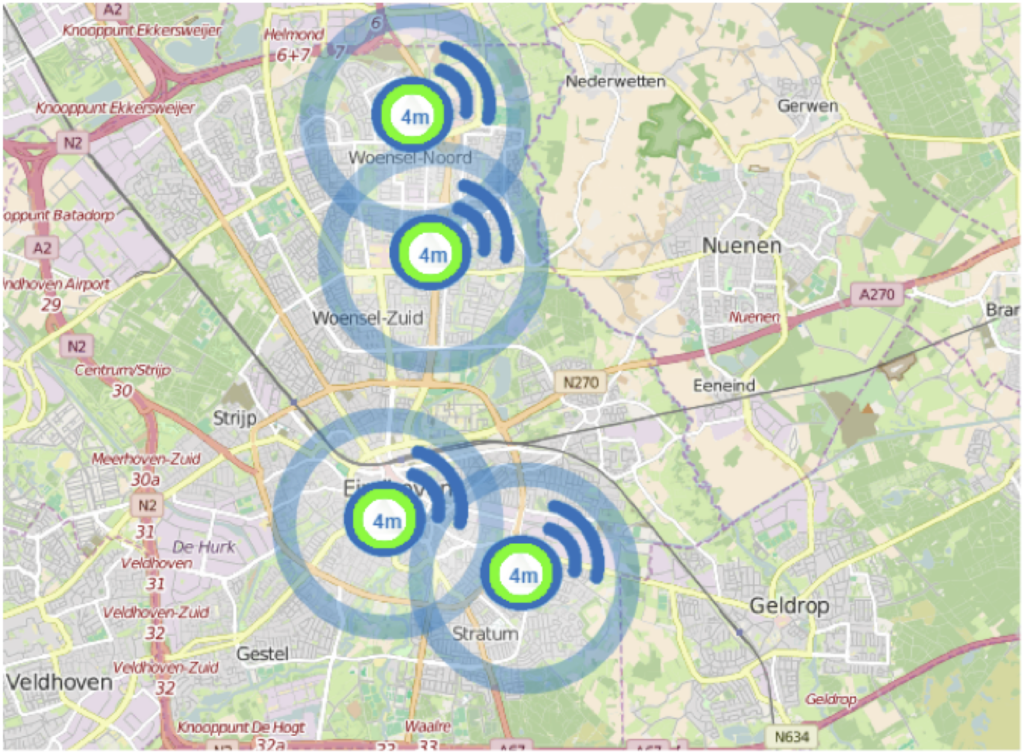
There are a lot of public LoRaWAN gateways, which provide free services. A map of these can be found on http://www.ttnmap.org/ . For example in Eindhoven there are 4 TTN LoRaWAN networks:

In order to connect to one of the free TTN LoRaWAN networks, you need to plug the RN2483 to the serial terminal to a PC, and send the following instructions:
- “mac set appskey 2B7E151628AED2A6ABF7158809CF4F3C“
- “mac set nwskey 2B7E151628AED2A6ABF7158809CF4F3C”
These two commands are the network security key for the TTN network and the key of the demo app that they provide.
- “mac set devaddr <unique devaddr>”
This is the address with which the node joins the network. This address should be between 02031200 and 020312FF. Make sure that you don’t use one of the claimed addresses, which can be found at this website: http://thethingsnetwork.org/wiki/AddressSpace; For example Trifork Eindhoven has the 02:D1:DC:xx address range reserved (xx can be any two hex digits)
- “mac pause”
- “radio set pwr 14”
- “mac resume”
This will increase the power of the antenna to maximum (14 db)
- “mac join abp”
This will save the settings and will connect the node to the TTN network. Unfortunately the TTN gateways dont give any acknowledgement.
- “mac tx uncnf 1 123456789”
This is the command that will send a package of data to the gateway on channel 1 that contains “123456789”. The data is hexadecimal, so make sure to translate the data in hexadecimal before sending it.
The last step is to check is the TTN network received the message from the node; this can be done at:
“http://thethingsnetwork.org/api/v0/nodes/[devaddr]/” where [devaddr] is the unique address that was chosen in the third step.
The pros of using the TTN network are:
- Free to use
- Easy to connect
- Expanding community, which might mean that there might be a lot of improvements.
The cons of using the TTN network are:
- Limited possibilities – You can only use the TTN network for receiving data from sensors, buttons etc. but you cannot send messages back. The latency is very big, so it cannot be used for time critical situations.
- The data is shared with everyone. Anyone can see the data that is sent from the nodes, since there is no log in and password system. (a solution would be the encryption of messages)
- No flexibility, which means that your nodes should always be in very specific places on maps where TTN LoRa gateways are available.
LoRaWAN personal gateways
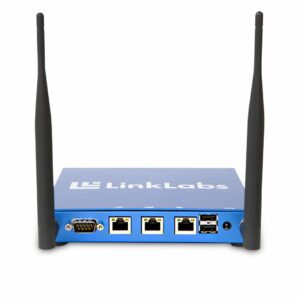
In order to have a personal LoRaWan network you need a class B router which is a gateway. As I previously mentioned, the prices may vary, depending on the antenna power, and possibilities that the product offers. One of the best options would be the LoRa 868Mhz Kerlink IoT Station: http://www.kerlink.fr/en/products/lora-iot-station-2/lora-iot-station-868-mhz

It has the best outdoor performance, and can operate at long ranges. It has PoE which means that there is no need for an external power supply. It also has very good documentation and product support. In order to buy the Kerlink Iot gateway you need to contact the company directly. Unfortunately they don’t have the prices listed on their website. The installation procedure can be found at: http://iot.semtech.com/resources/Kerlink_IoT_station_page/files.xml?action=download&file=Kerlink_gateway_installation_R7.pdf
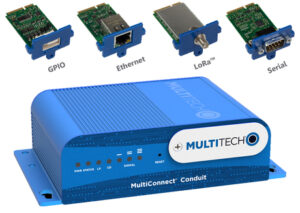
Another solution is the Multitech Conduit with the LoRa mcard. The multiconnect is a universal tool for the Internet of things. You can buy different communication modules like Ethernet, UART and LoRa. It runs linux, and it can be configured according to the use case. The price of this product is 299$ for the Ethernet version and 449$ for the 3G plus 170$ for the LoRa module.

More info can be found at: http://www.multitech.com/brands/multiconnect-conduit
There are many DIY options, for example: http://cpham.perso.univ-pau.fr/LORA/RPIgateway.html. This one would cost only 70 euros, including the raspberry pi and would theoretically do the same sob as the previous routers, however, in order to achieve the long ranges you need to buy a bigger antenna than the one in the tutorial.
A cheap solution is to use the iC880A – LoRaWAN Concentrator 868MHz with a raspberry pi or any other IoT platform that can connect to the internet. A quickstart guide is available at http://www.wireless-solutions.de/images/stories/downloads/Radio%20Modules/iC880A/iC880A_QuickStartGuide.pdf .
In my opinion this is the best solution for setting up a small demo LoRa network. This shield is around 170 euro and it requires an additional antenna which can be bought for less than 10 euro.
Conclusion
In conclusion, I can say that the LoRaWAN protocol offers a lot of possibilities, and it’s a significant step towards the long range communication in the internet of things. It does have some drawbacks around the (very) open networks, but commercial activity is underway to provide many closed-open networks. In areas where long range communication is wanted for sensors, actors, and other peripherals LoRa(WAN) is a promising technology!
If you have any questions, ideas, or want us to help with your LoRa solution let us know!