HTML Canvas

During my holiday I start to read about the HTML5 canvas object which can be used for a variety of graphical presentations or animations. Honestly, I was quite surprised about the possibilities of the canvas element. At first I am going to give a short description about the canvas object. Which is followed by a simple canvas example and a small part about how to draw a circle. In the end a conclusion is given.
The Canvas Object
Since HTML5 a canvas element is available to use. It is actually used to draw graphics via JavaScript. Therefore the canvas html5 element is more of a container for a graphical object which will be drawn via JavaScript. A canvas element has just two attributes width and height. By default the width is 300 and the height is 150.
<canvas width='600' height='300'>
 Canvas not supported
</canvas>
That is all and how can we do the fancy graphic stuff? For that we are using the context of the canvas element which we can obtain in JavaScript with
var canvas = document.getElementByID(‘canvas’);
var context = canvas.getContext(‘2d’);
The context variable is the key to perform graphics with the canvas element. Let us take a look on the attributes of the context.
- canvas
- Refers to the canvas. You can change the height and width with it
- fillStyle
- A color, gradiant, or pattern uses to fill shapes
- font
- Font to use
- globalAlpha
- Global Alpha setting is number between 0 and 1.0
- globalCompositeOperation
- How the browser draw one thing over another
- lineCap
- How the browser draws endpoints of a line
- lineWidth
- The width of a line
- lineJoin
- How lines are joined when their endpoints meet
- miterLimit
- How to draw a miter line join
- shadowBlur
- How the browser spreads out shadow
- shadowColor
- The color used to draw shadows
- shadowOffsetX
- the horizontal offset for shadows
- shadowOffsetY
- The vertical offset for shadows
- strokeStyle
- the style used to stroke paths
- textAlign
- The horizontal placement of text
- textBaseline
- The vertical placement of text
Okay let’s start with creating a simple canvas object.
A Simple Canvas
To create a canvas we need a HTML file and a JavaScript file. The HTML file is presented below.
<DOCTYPE html>
<html>
<head>
  <title>Canvas Simple Example</title>
</head>
<body>
  <canvas id='canvas' width='600' height='300'>
    Canvas is not supported
  </canvas>
  <script src=’example.js’></script>
</body>
</html>
Pretty easy or? And that is how you create a canvas element and give it an id, width, and height. Let us take a look into the example.js file.
var canvas = document.getElementById(‘canvas’);
var context = canvas.getContext(‘2d’);
context.fillStyle = “blue”;
context.font = “bold 16px Arial”;
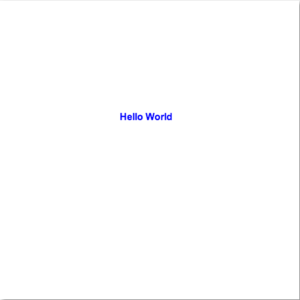
context.fillText(“Hello World”, 100, 100);
The JavaScript code let you get the canvas element with document.getElementById(‘canvas’). In the second row we get the context of the canvas element. The context is the tool that let us draw all kind of shapes and text on the canvas. There are two context which can be obtain the 2d context and the webGl context. The webGl context is more used for 3d animation. The last three rows are specifying the color of the text, the font, and what actually should be printed and on which position on the canvas. As result we have canvas with the height and width of 500 and a text which is blue, bold, 16px, and Arial (see screenshot below).

Drawing shapes
Shapes can be fun and could be used for different kinds of applications and with the canvas element you can create all kind of shapes. Let us create a shape of a circle to show it. At first we need as in the previous example an html page with a canvas element.
<DOCTYPE html>
<html>
<head>
  <title>Canvas Animation</title>
</head>
<body>
  <canvas id=”canvas” width=”500” height=”500”>
    Canvas not supported
  </canvas>
</body>
</html>
Nothing new here now let us create the JavaScript part.
var canvas = document.getElementById(‘canvas’);
var context = canvas.getContext(‘2d’);
var centerX = canvas.width / 2;
var centerY = canvas.height / 2;
var radius = 70;

context.beginPath();
context.arc(centerX, centerY, radius, 0, 2 * Math.PI, false);
context.fillStyle = ‘green’;
context.fill();
context.lineWidth = 5;
context.strokeStyle = ‘#003300’
context.stroke();
In the first two rows we obtain the canvas and context again. Furthermore we calculate the centerX coordinate and the centerY coordinate. The last variable is the radius of the circle. After the initialization of the variables we call the method beginPath() which tells the canvas element that we want to draw something. The next method call arc expects six parameter whereby the last parameter is optional. The function fill() as the name already let suggest fills the circle with the color green. The function stroke()
Our canvas contains a circle now.

Conclusion
The canvas element is a nice feature if you like to create nice interactive user interfaces. It has a good API which provides a lot of handy features. If I got you inspired I can recommend a book called Core HTML canvas from David Geary which explains the canvas element complete and shows a lot of use cases you how to use it.